Vaga OS
Vaga OSDownload Center
Back to Home
Offline setup package

Download Vaga OS for your hotel network.

Install the Server file on your main PC, then use the Client file for other PCs connected to the same local network.

Setup tutorial

Follow the setup in the right order.

Open each guide card when needed. The screenshots show the exact screens you will see during installation, first launch and first login setup.

Installation - Choose desktop shortcuts
1

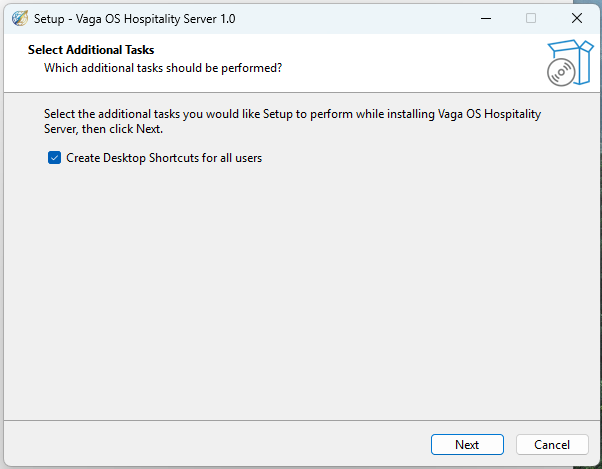
Choose desktop shortcuts

Keep the desktop shortcut option selected so both Vaga OS and Vaga Server are easy to open after setup. Click Next to continue.
Installation - Confirm installation
2

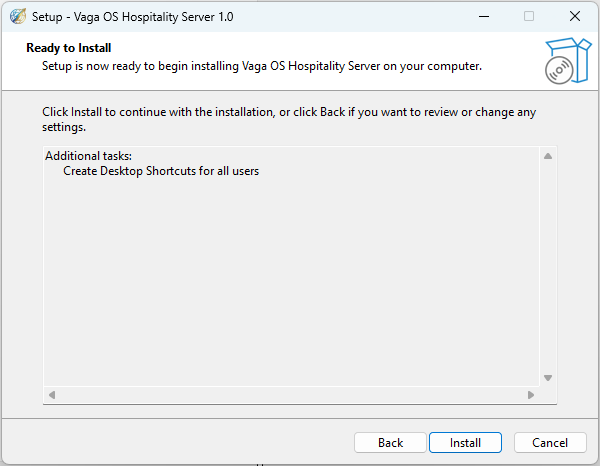
Confirm installation

Review the selected options on the Ready to Install screen, then click Install to begin copying the application files.
Installation - Let setup finish
3

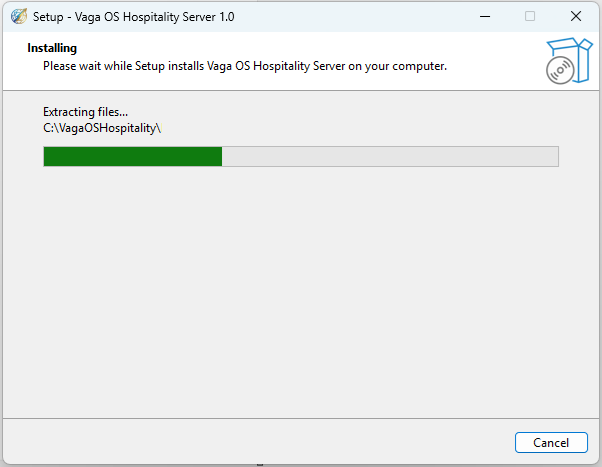
Let setup finish

The installer places the application files in the VagaOS Hospitality folder. Wait until the progress screen completes.
Installation - Note the important folders
4

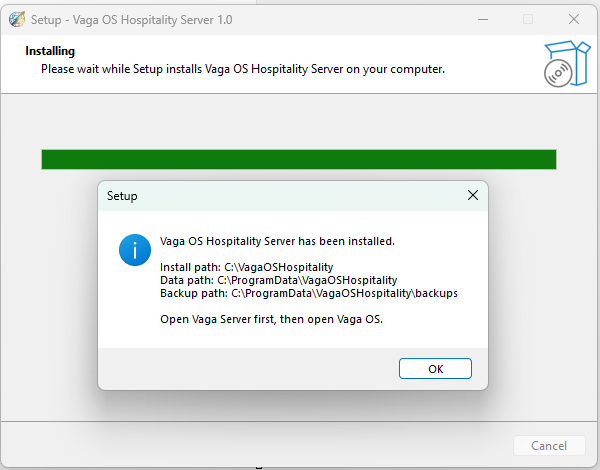
Note the important folders

The completion message shows the install, data and backup locations. Keep these paths for support and backup reference.
Installation - Launch the server first
5

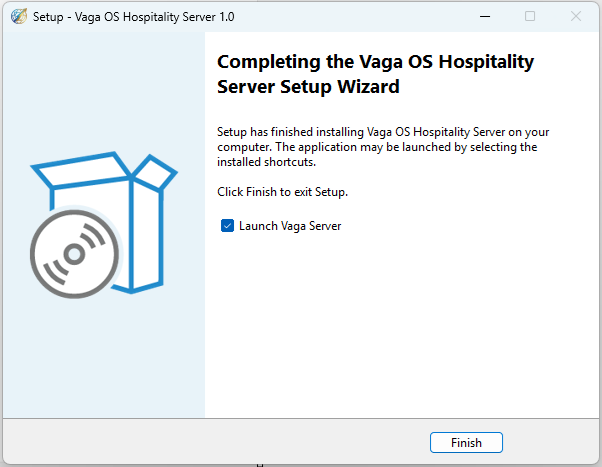
Launch the server first

Leave Launch Vaga Server selected and click Finish. The server should be started before opening the main Vaga OS app.
Installation - Use the desktop icons
6

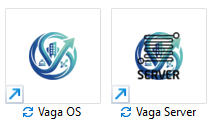
Use the desktop icons

After installation you will see Vaga Server and Vaga OS shortcuts. Open Vaga Server first, then open Vaga OS.
VagaOS Server App - Open the control center
1

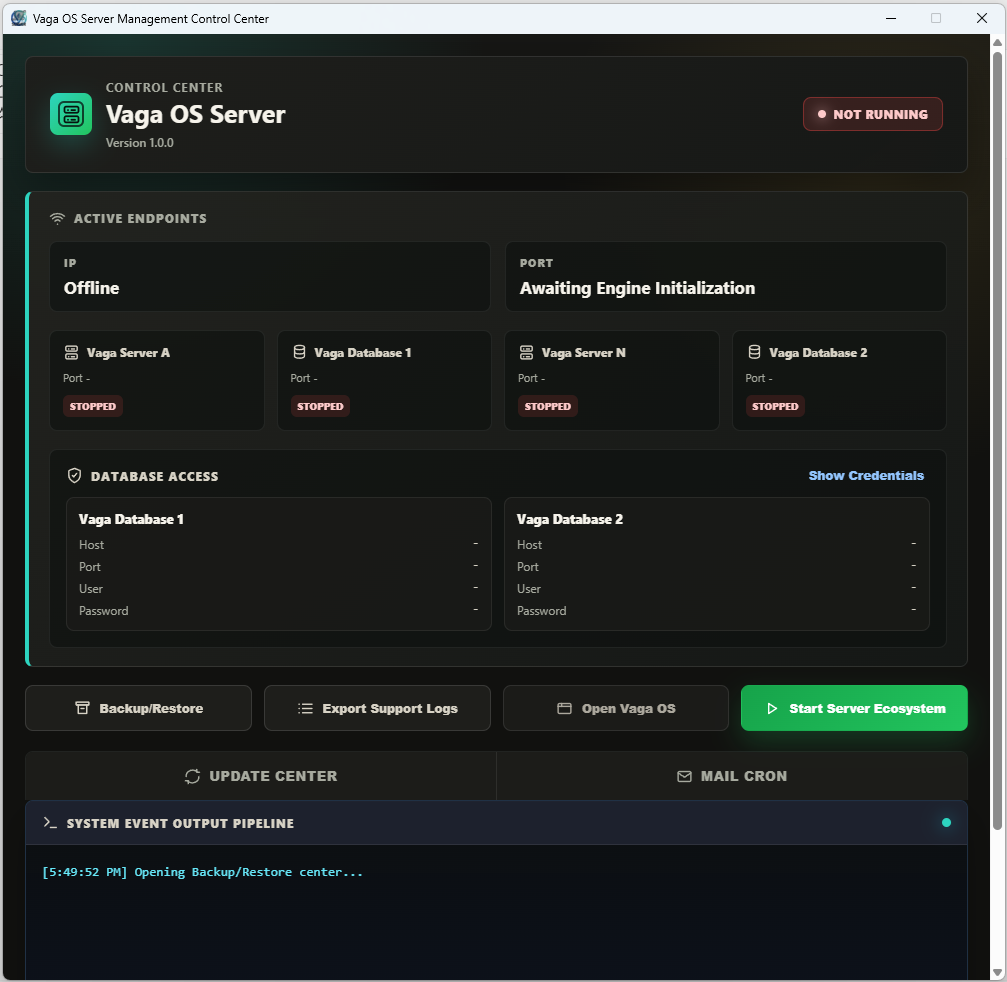
Open the control center

When the server is stopped, the dashboard shows offline services. Click Start Server Ecosystem to start the local services.

VagaOS Server App - Confirm running status
2

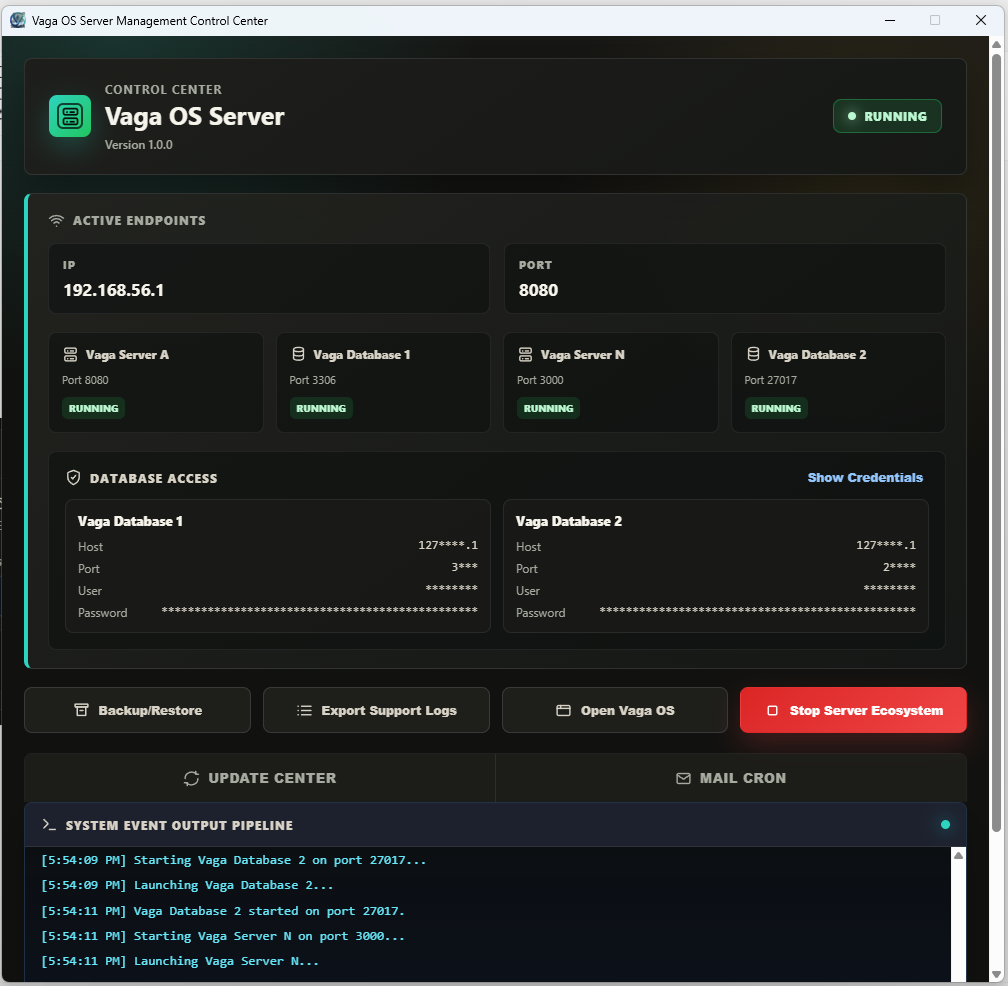
Confirm running status

When the server is running, note the IP and port. Client PCs on the same network will use this server connection.

VagaOS Server App - Set backup location
3

Set backup location

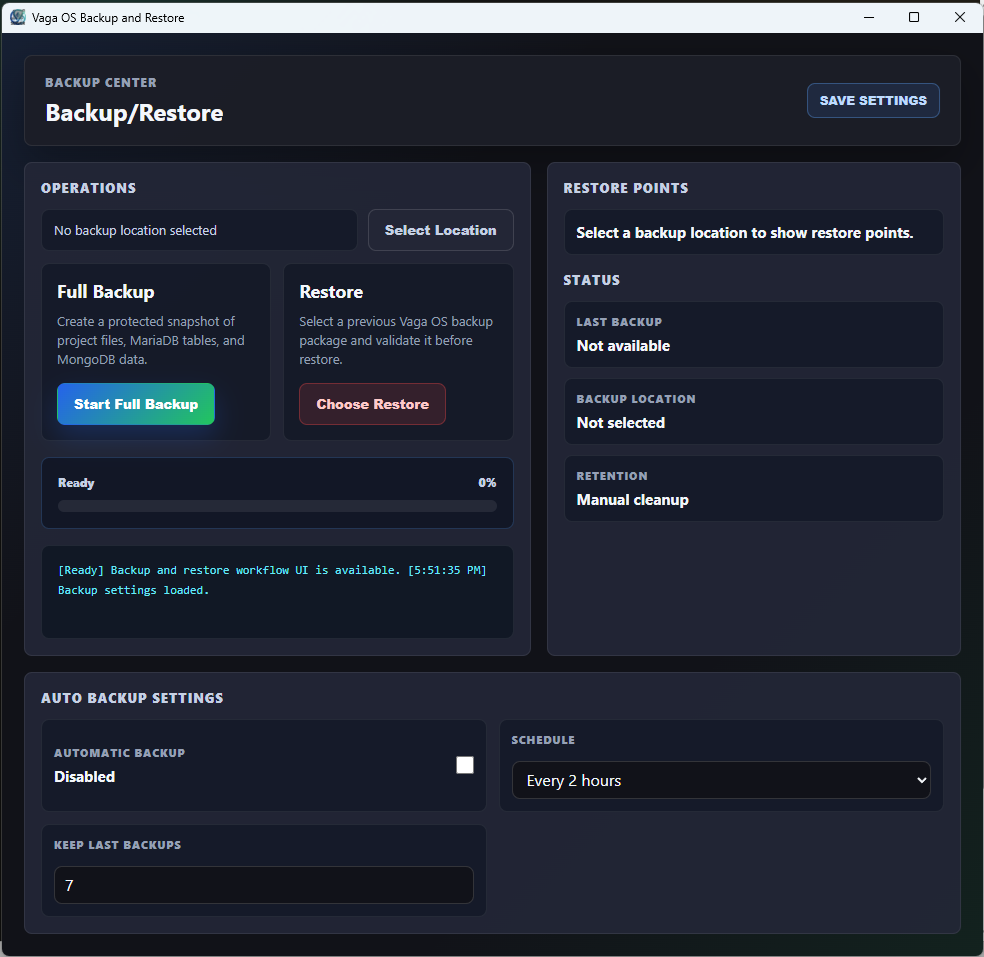
Use Backup/Restore to select where backups should be stored, create full backups and restore from saved restore points when needed.

VagaOS Server App - Check for updates
4

Check for updates

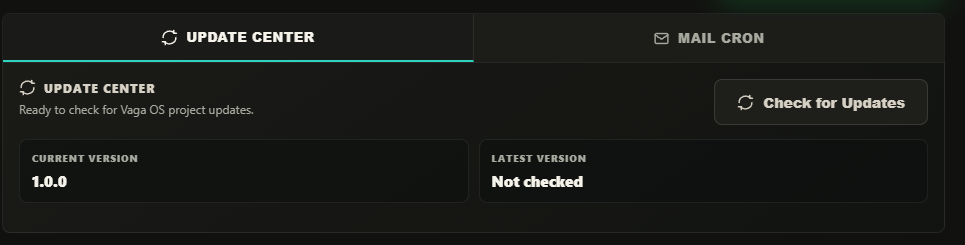
The Update Center shows the current version and lets you check when a new project update is available.

VagaOS Server App - Enable mail cron
5

Enable mail cron

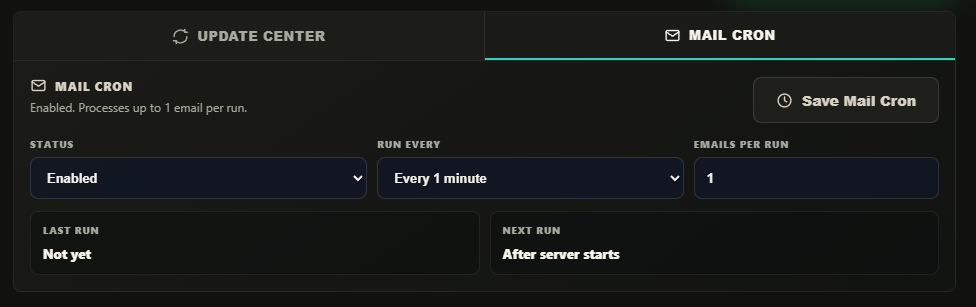
Mail Cron controls automatic email sending from the local server. Keep it enabled and set how often it should run.

VagaOS App First Time - Start local installation
1

Start local installation

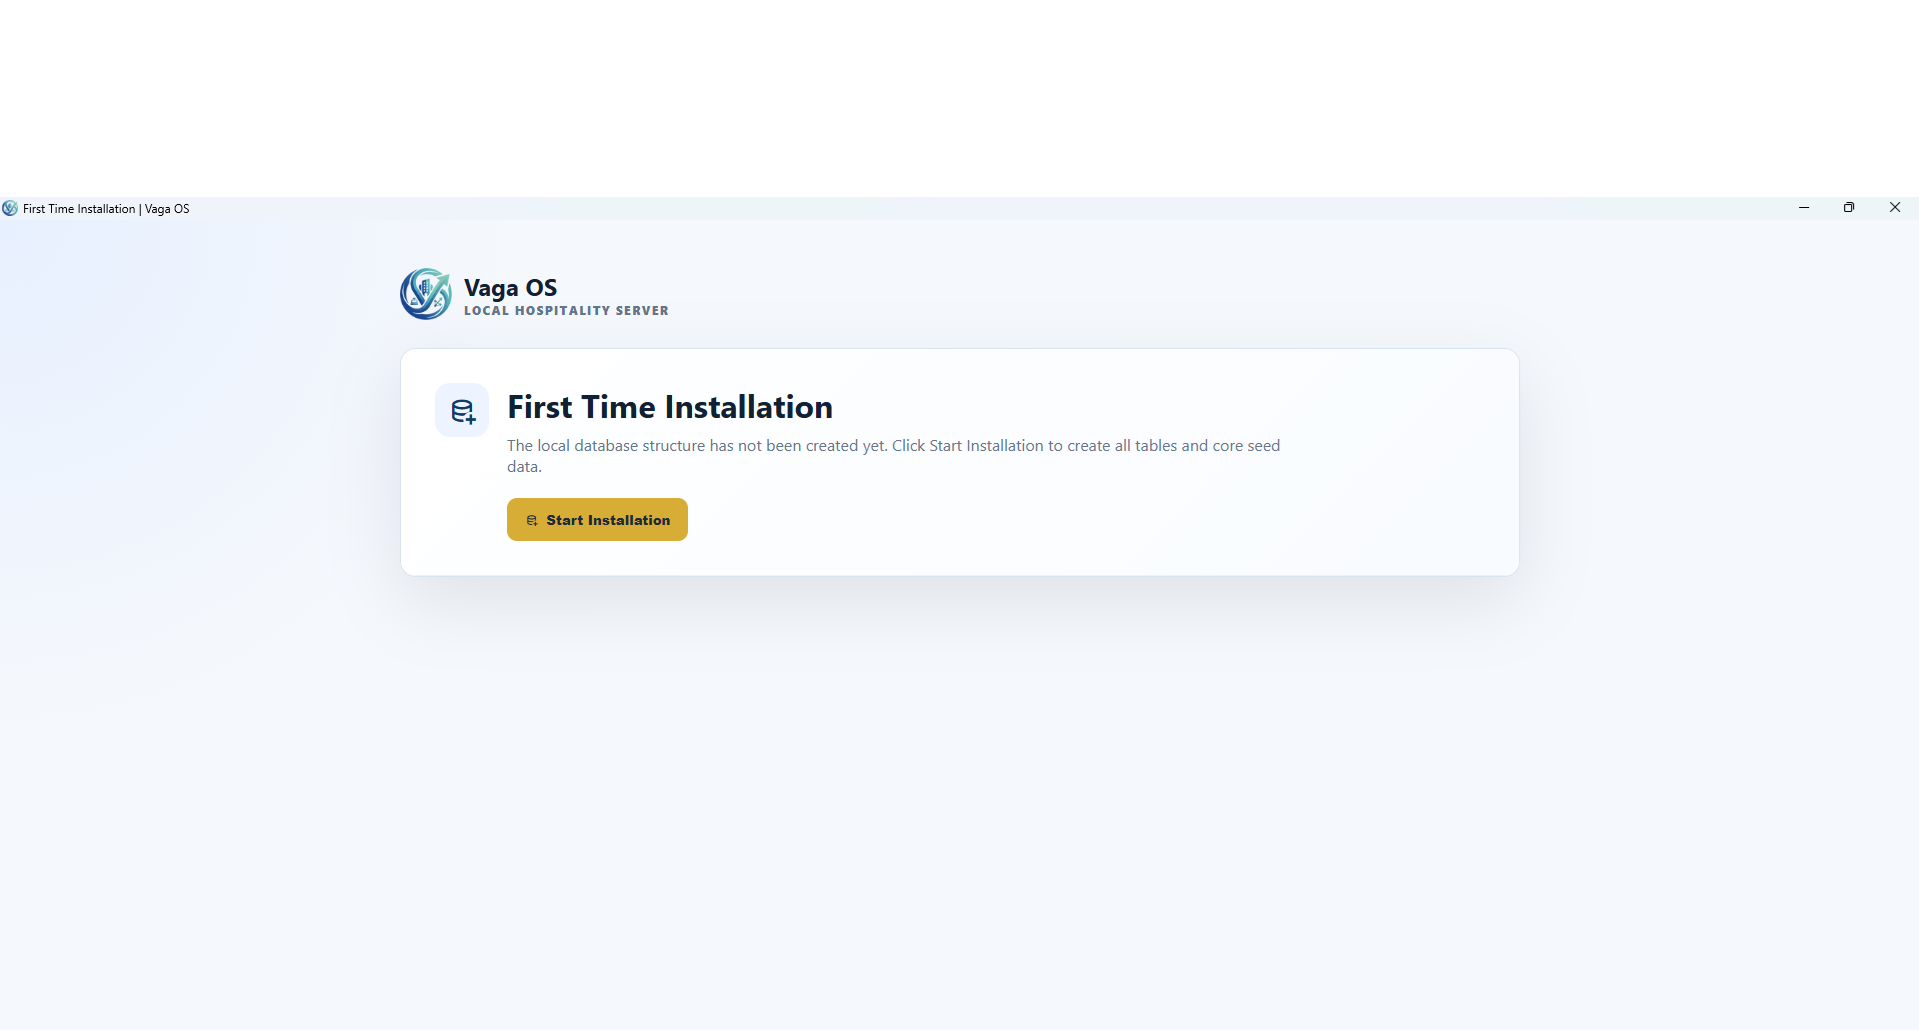
The first launch creates the local database structure. Click Start Installation once the server is already running.

VagaOS App First Time - Wait for database setup
2

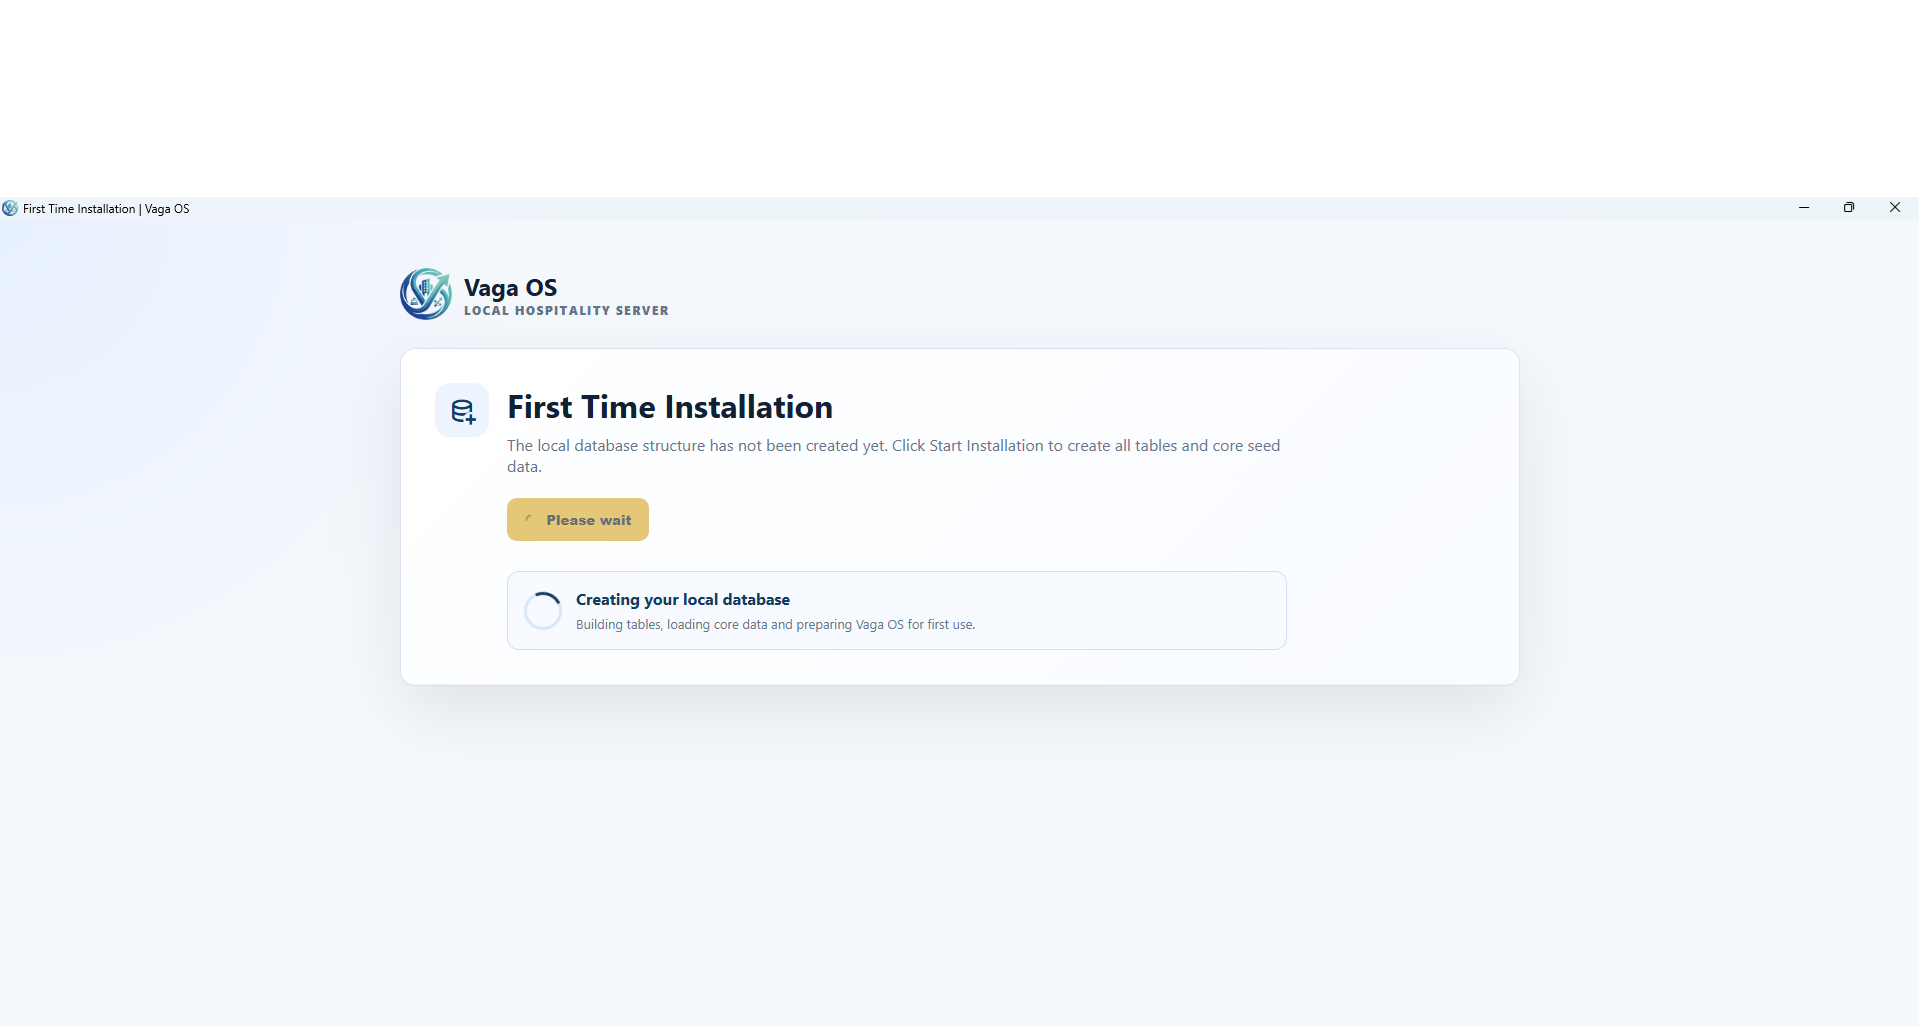
Wait for database setup

Vaga OS creates tables, loads core data and prepares the system for first use. Keep the app open until this finishes.

VagaOS App First Time - Register the property
3

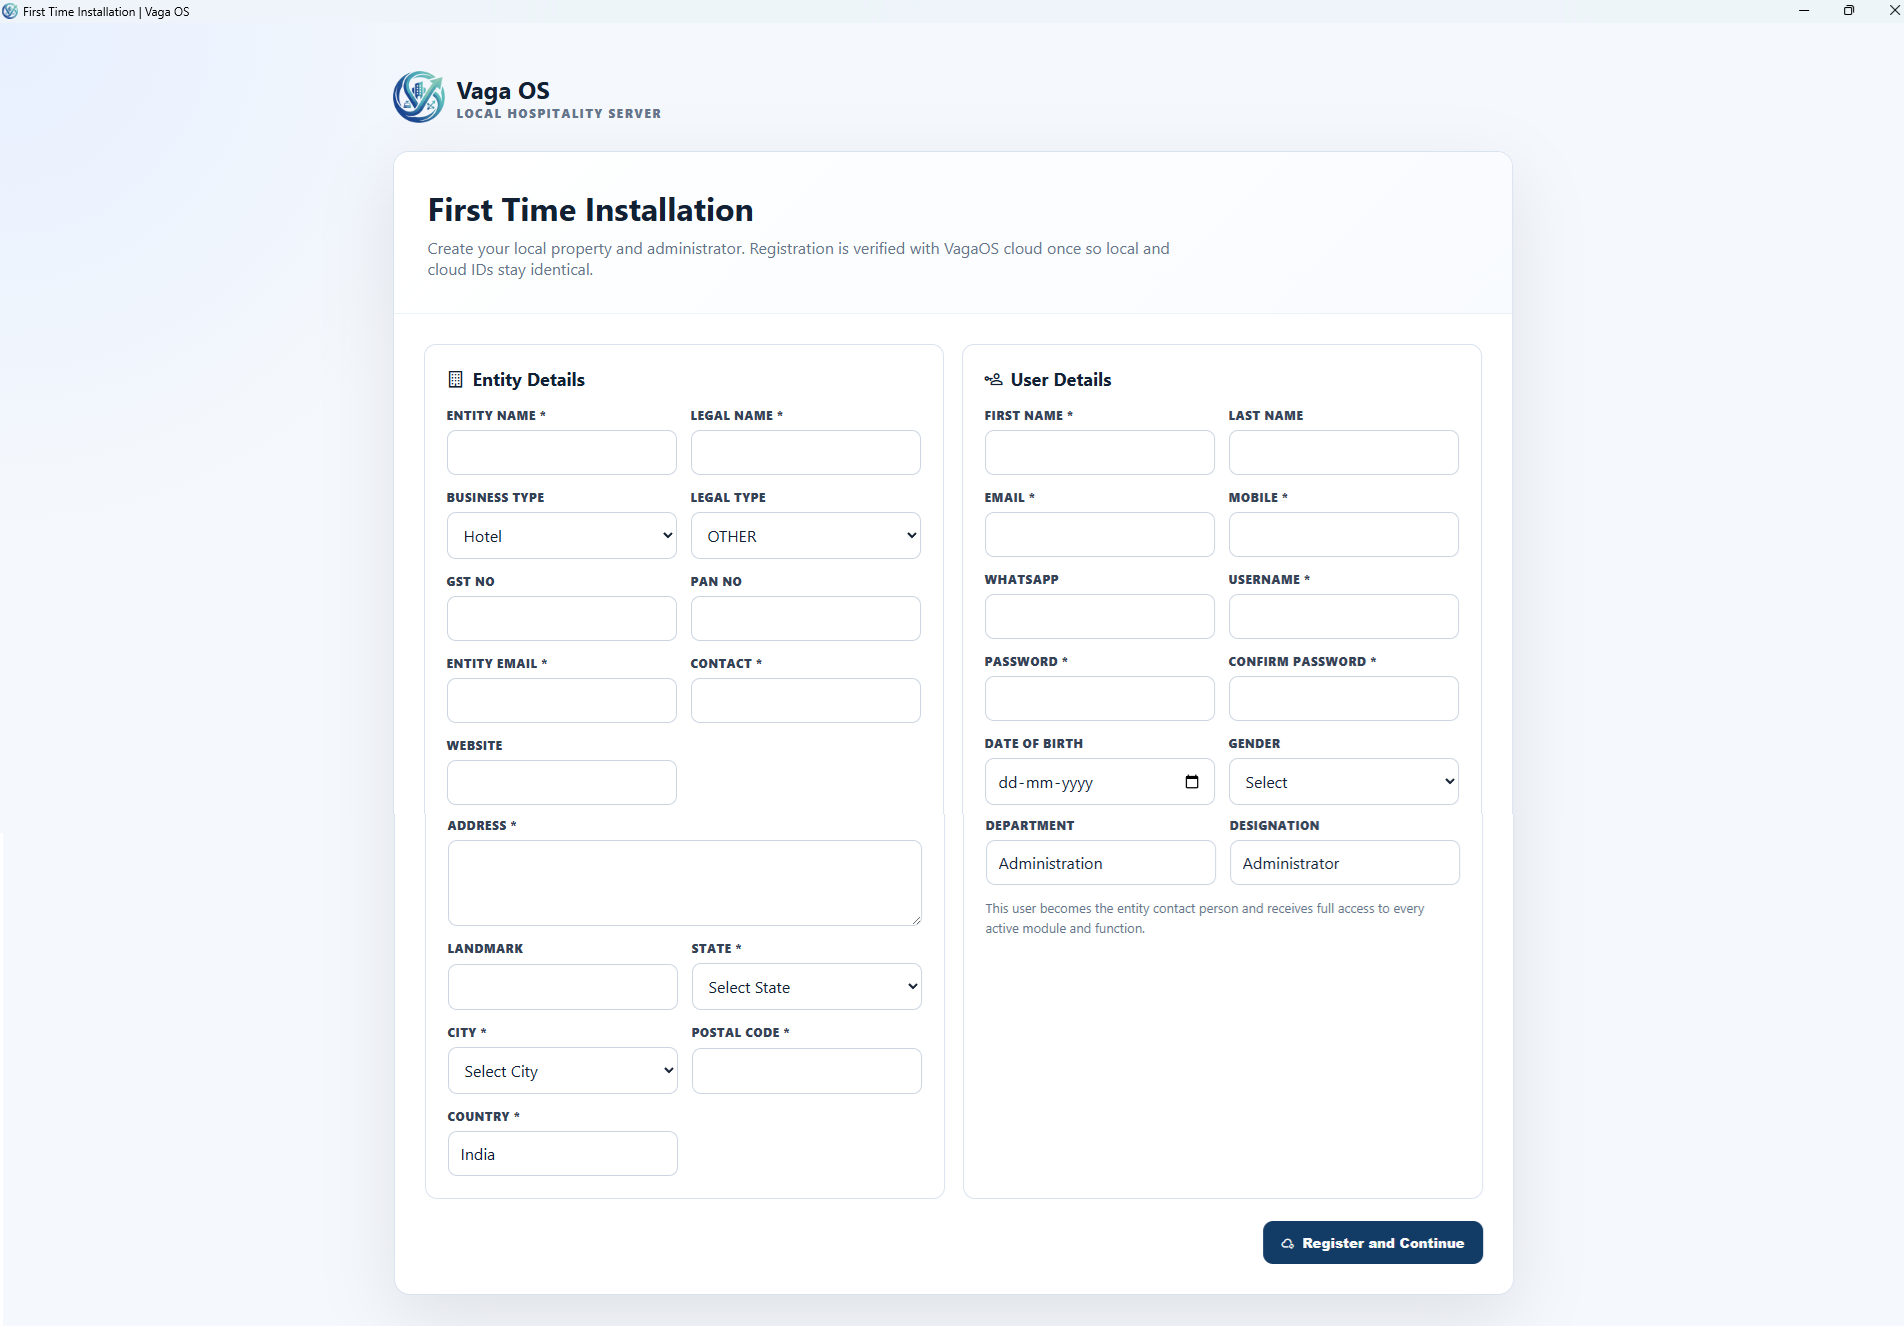
Register the property

Enter the property and administrator details carefully. These details prepare the first local account and property profile.

VagaOS App First Time - Login after registration
4

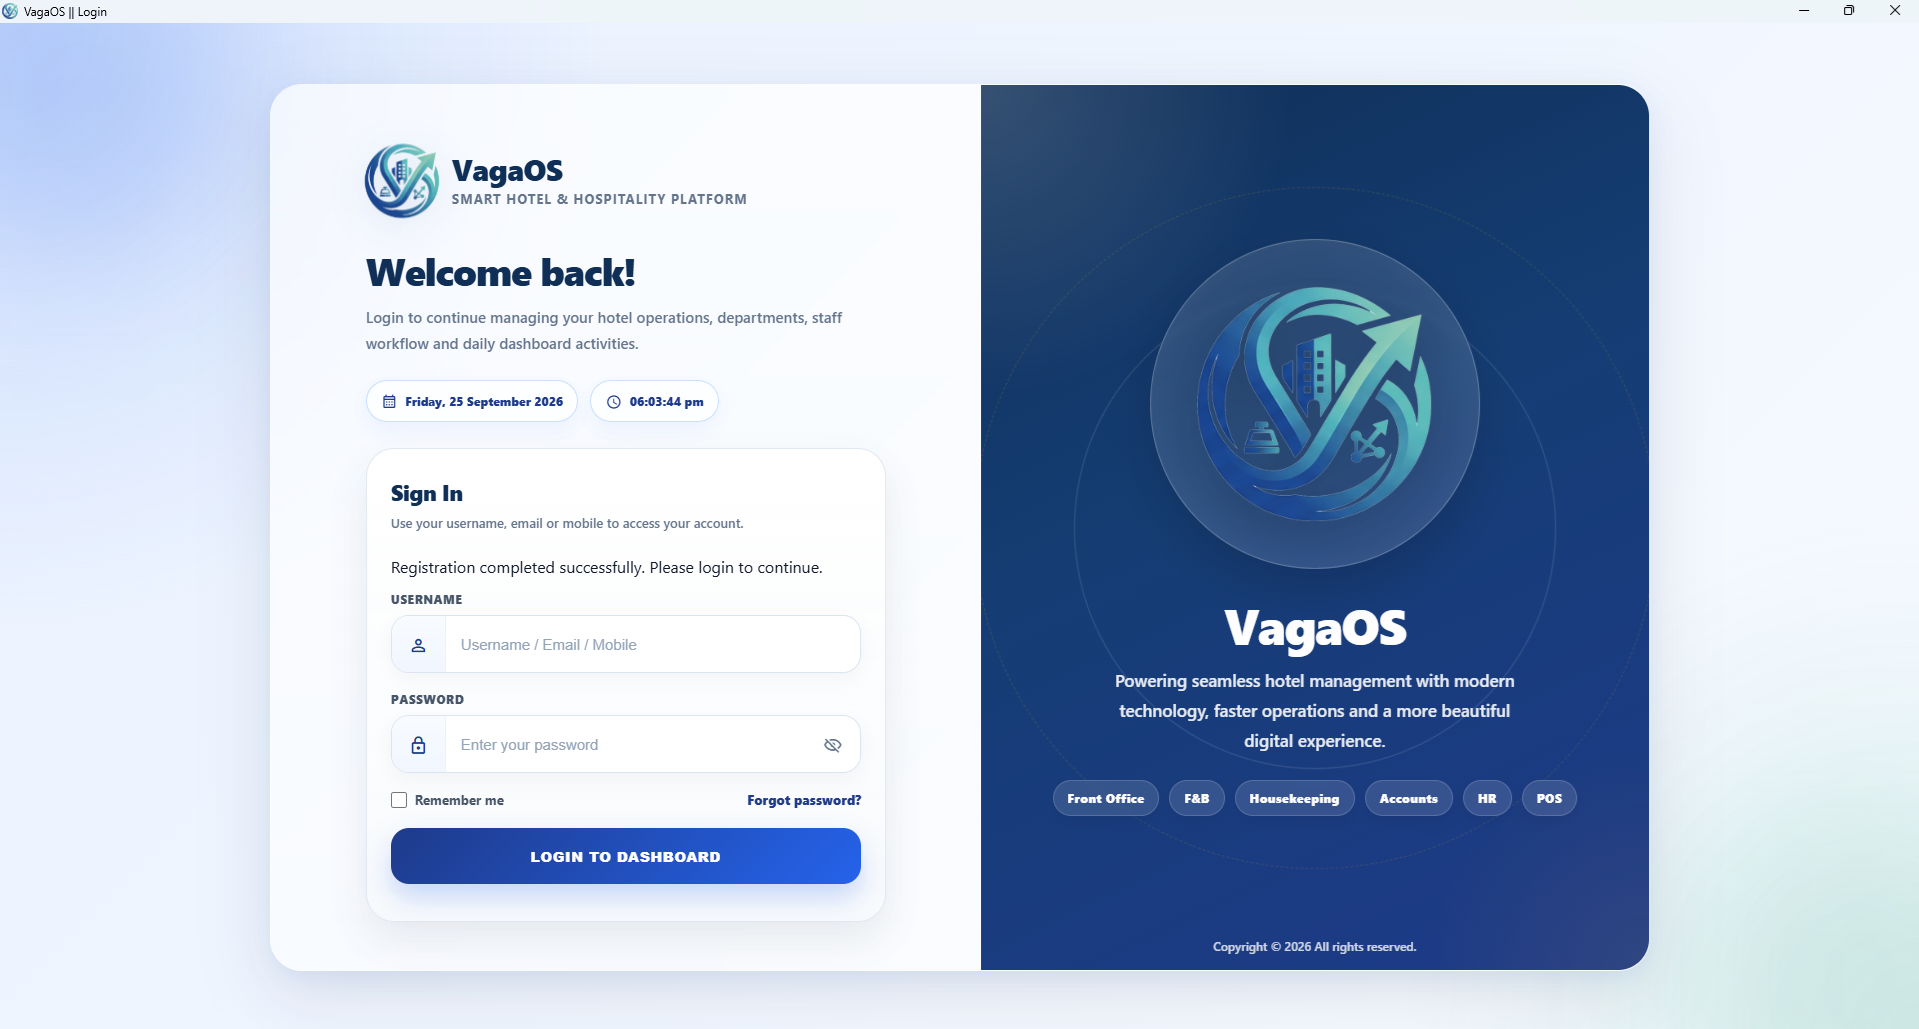
Login after registration

After registration completes, sign in with the username, email or mobile number and the password created during setup.

First Login Setup - Complete property details
1

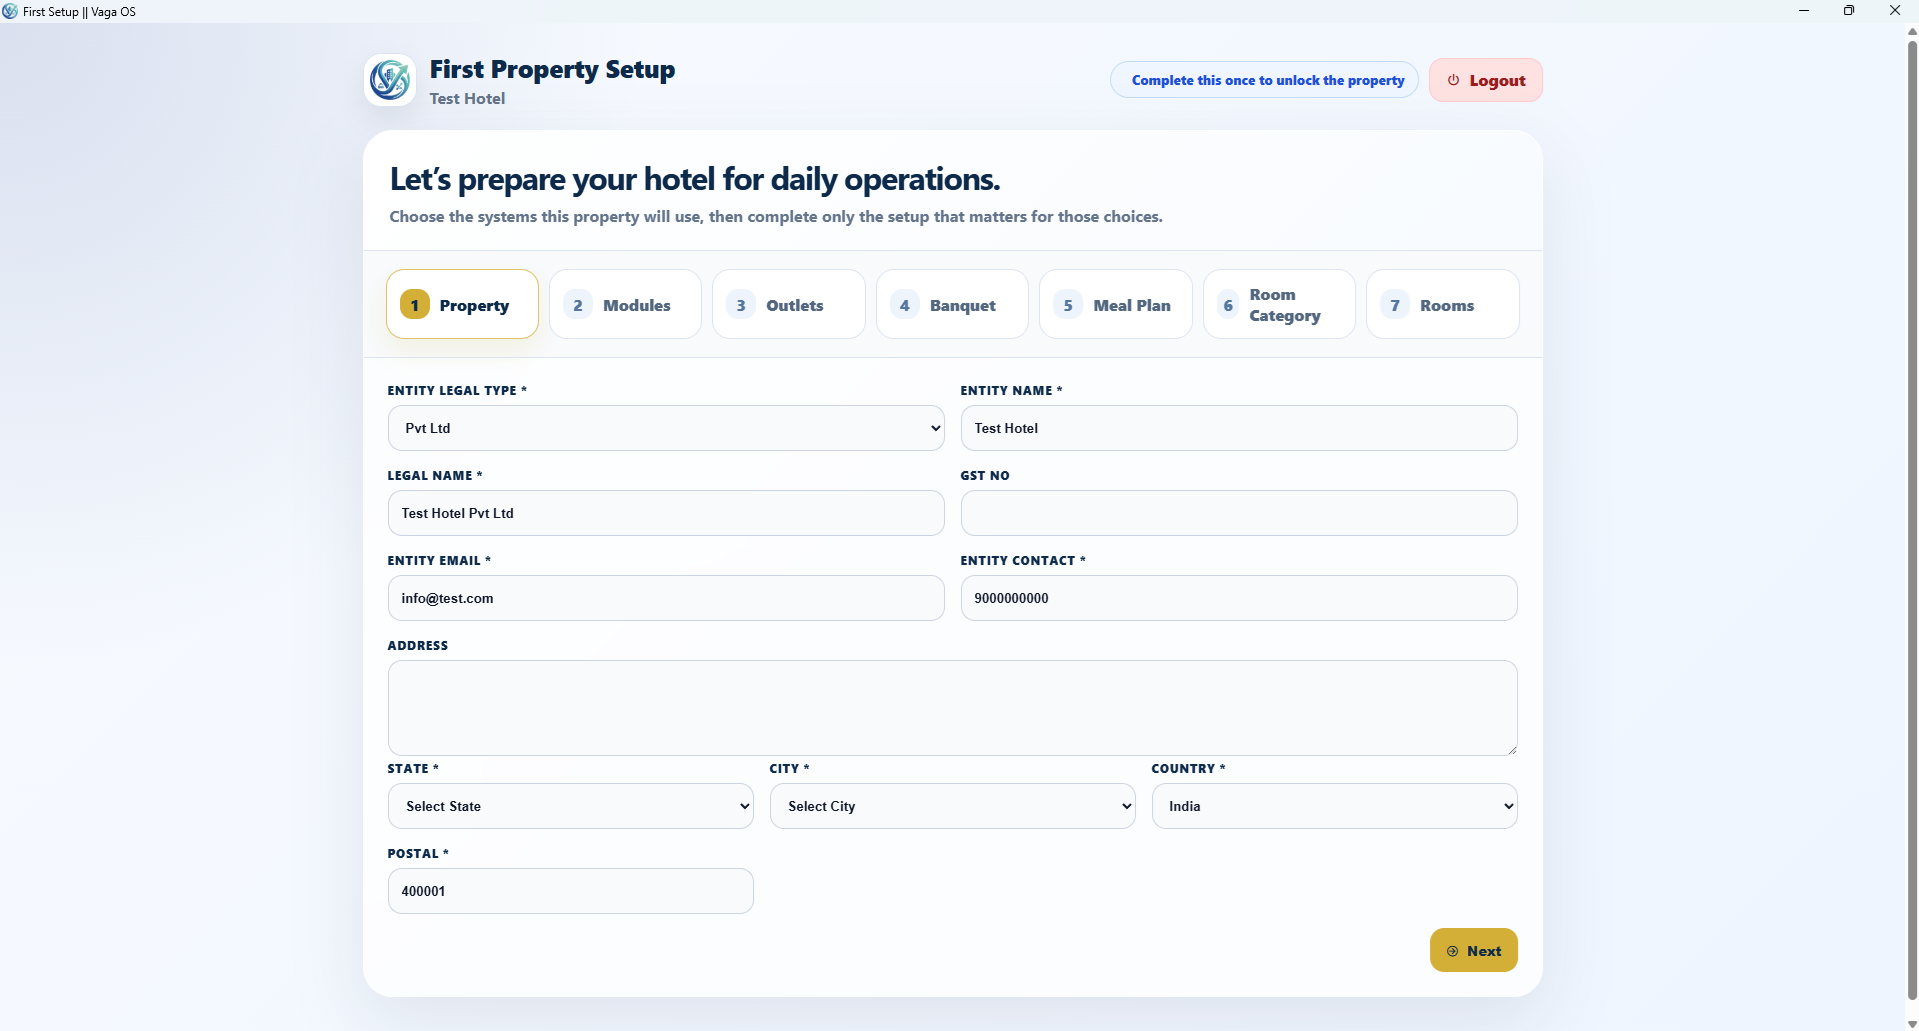
Complete property details

Verify legal name, GST, contact and address details. This unlocks the property for daily use after setup is finished.

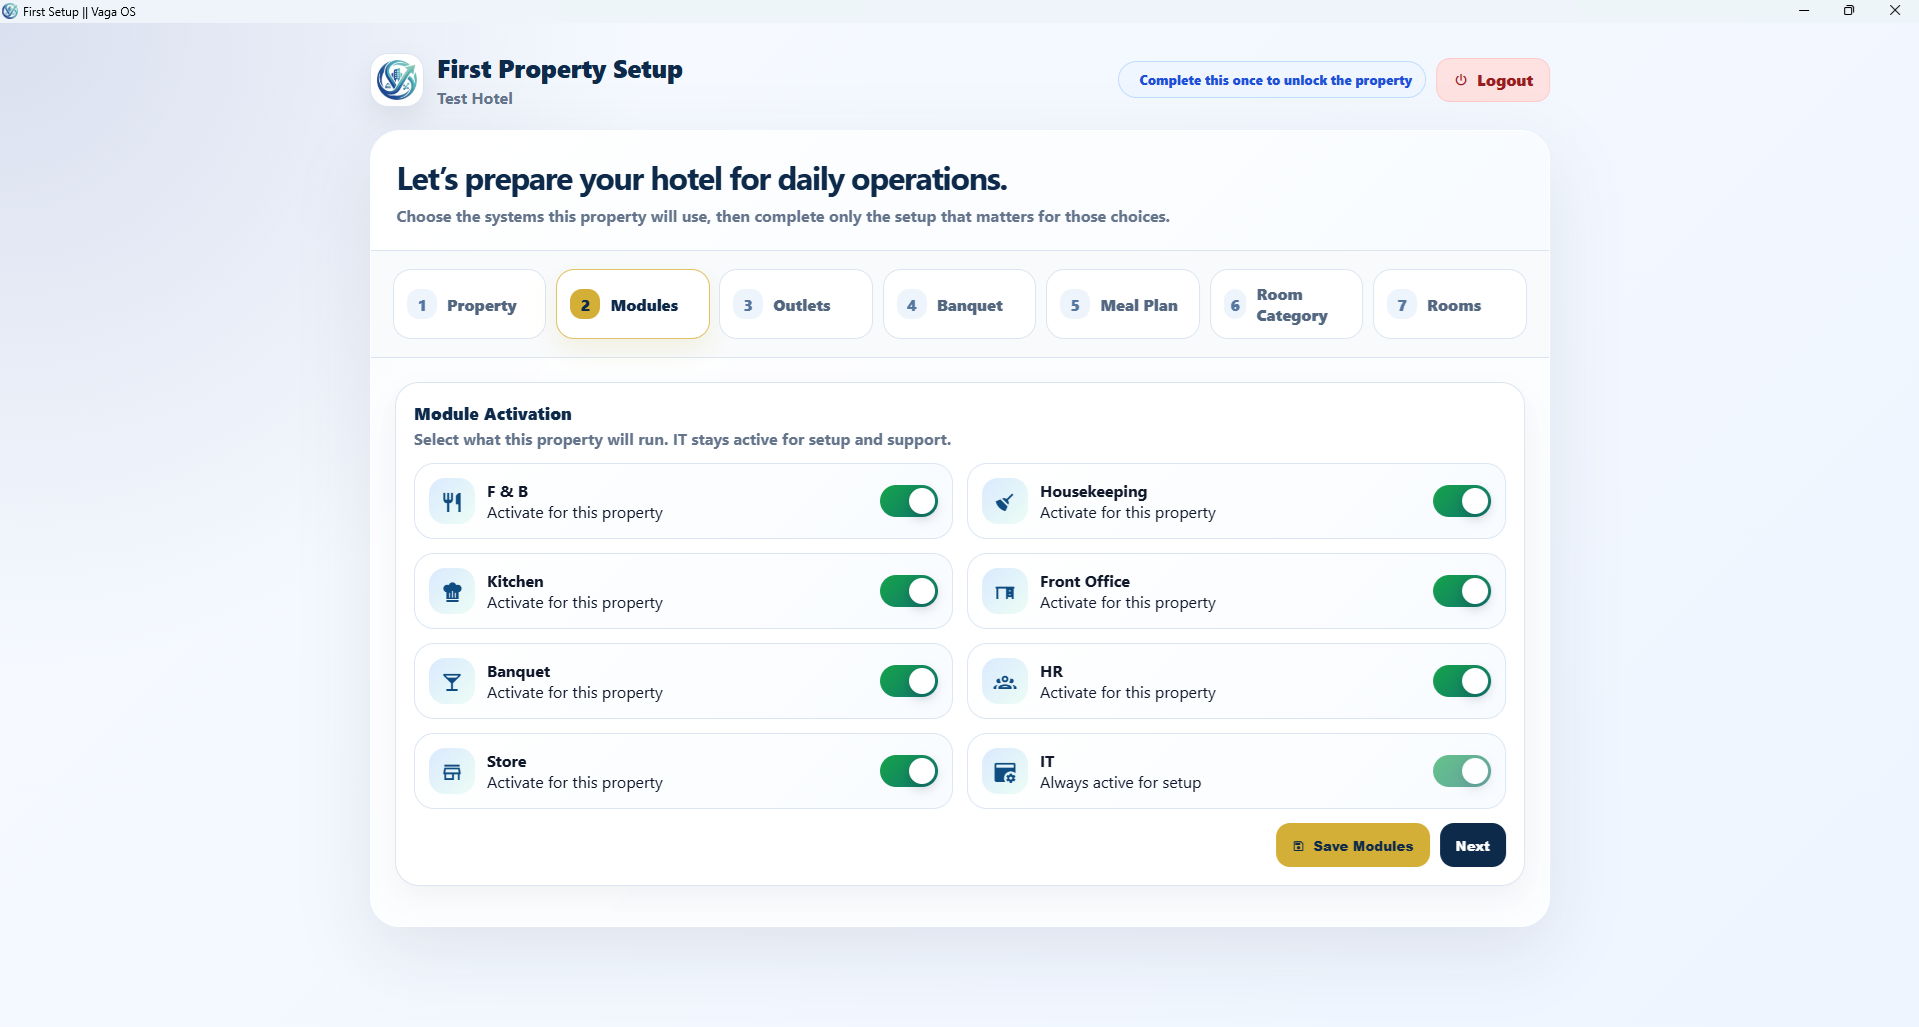
First Login Setup - Select active modules
2

Select active modules

Turn on the departments this property will use. IT stays active for setup and support. Save modules before moving ahead.

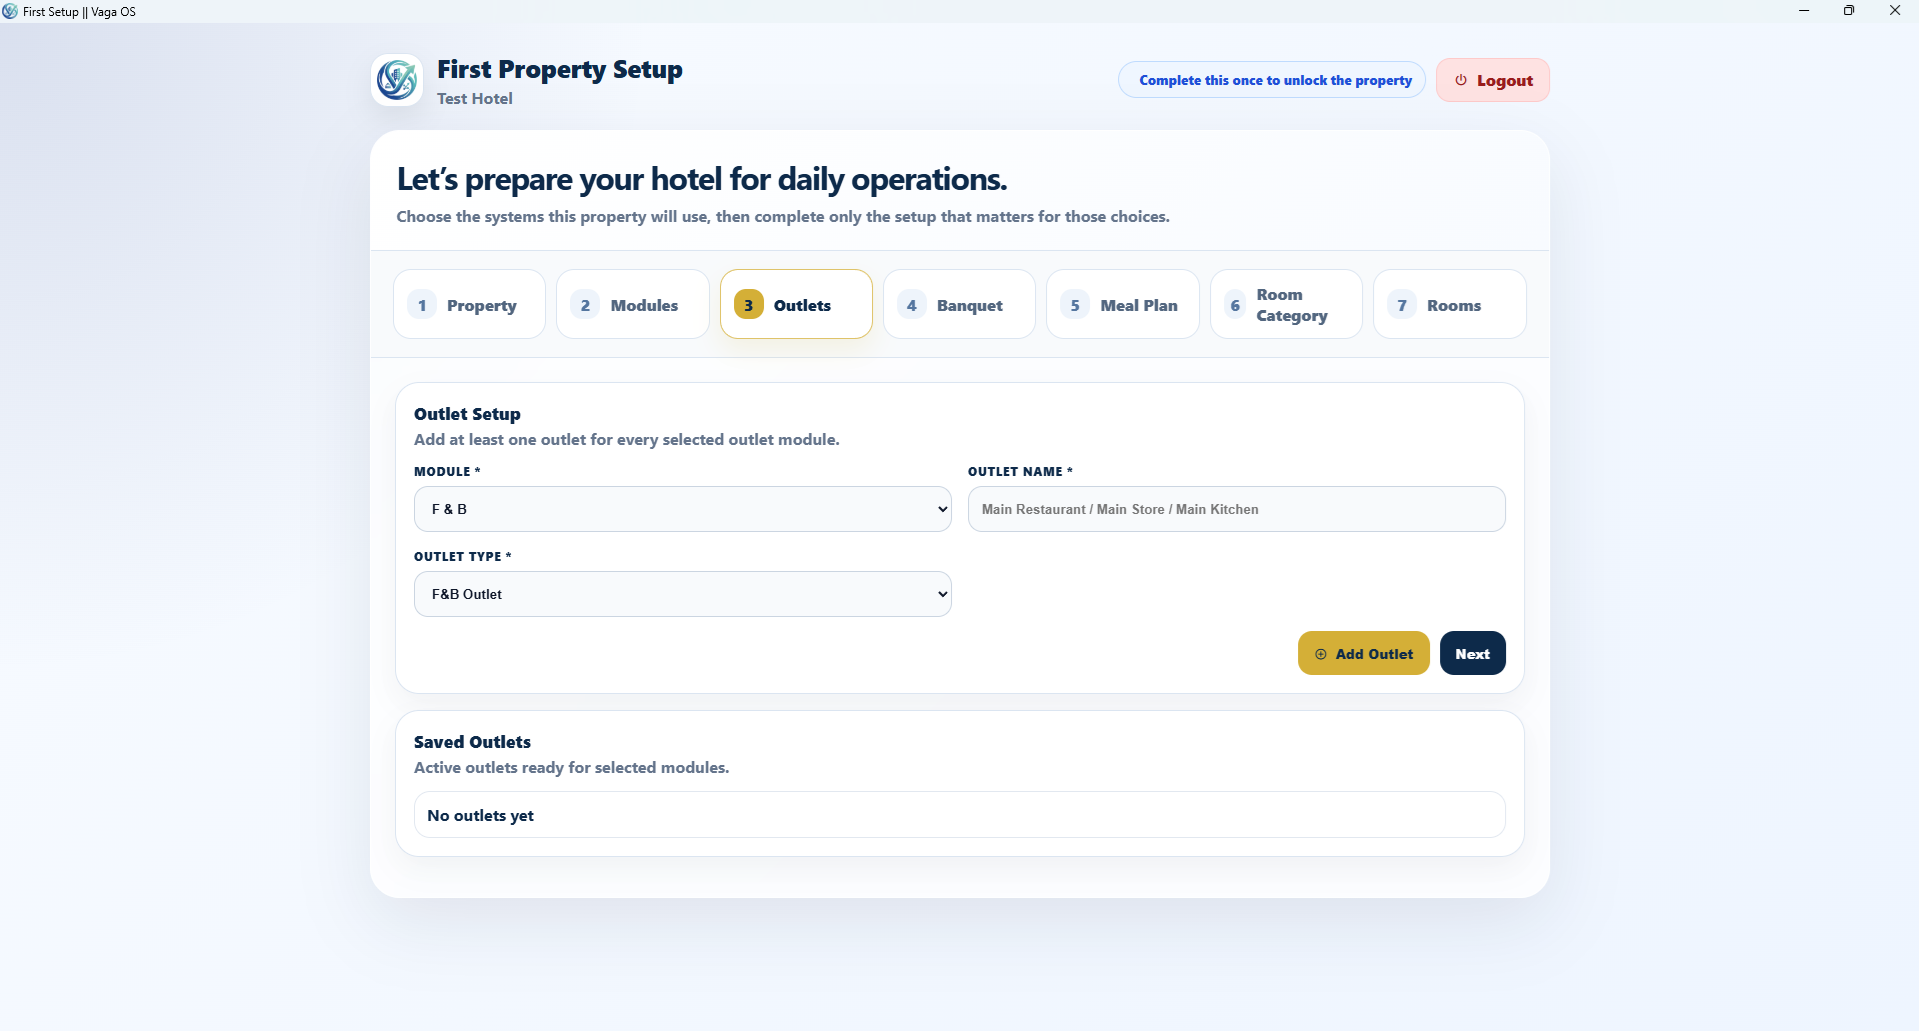
First Login Setup - Add outlets if required
3

Add outlets if required

For outlet based modules such as F&B, Kitchen and Store, add at least one outlet so permissions and operations can work correctly.

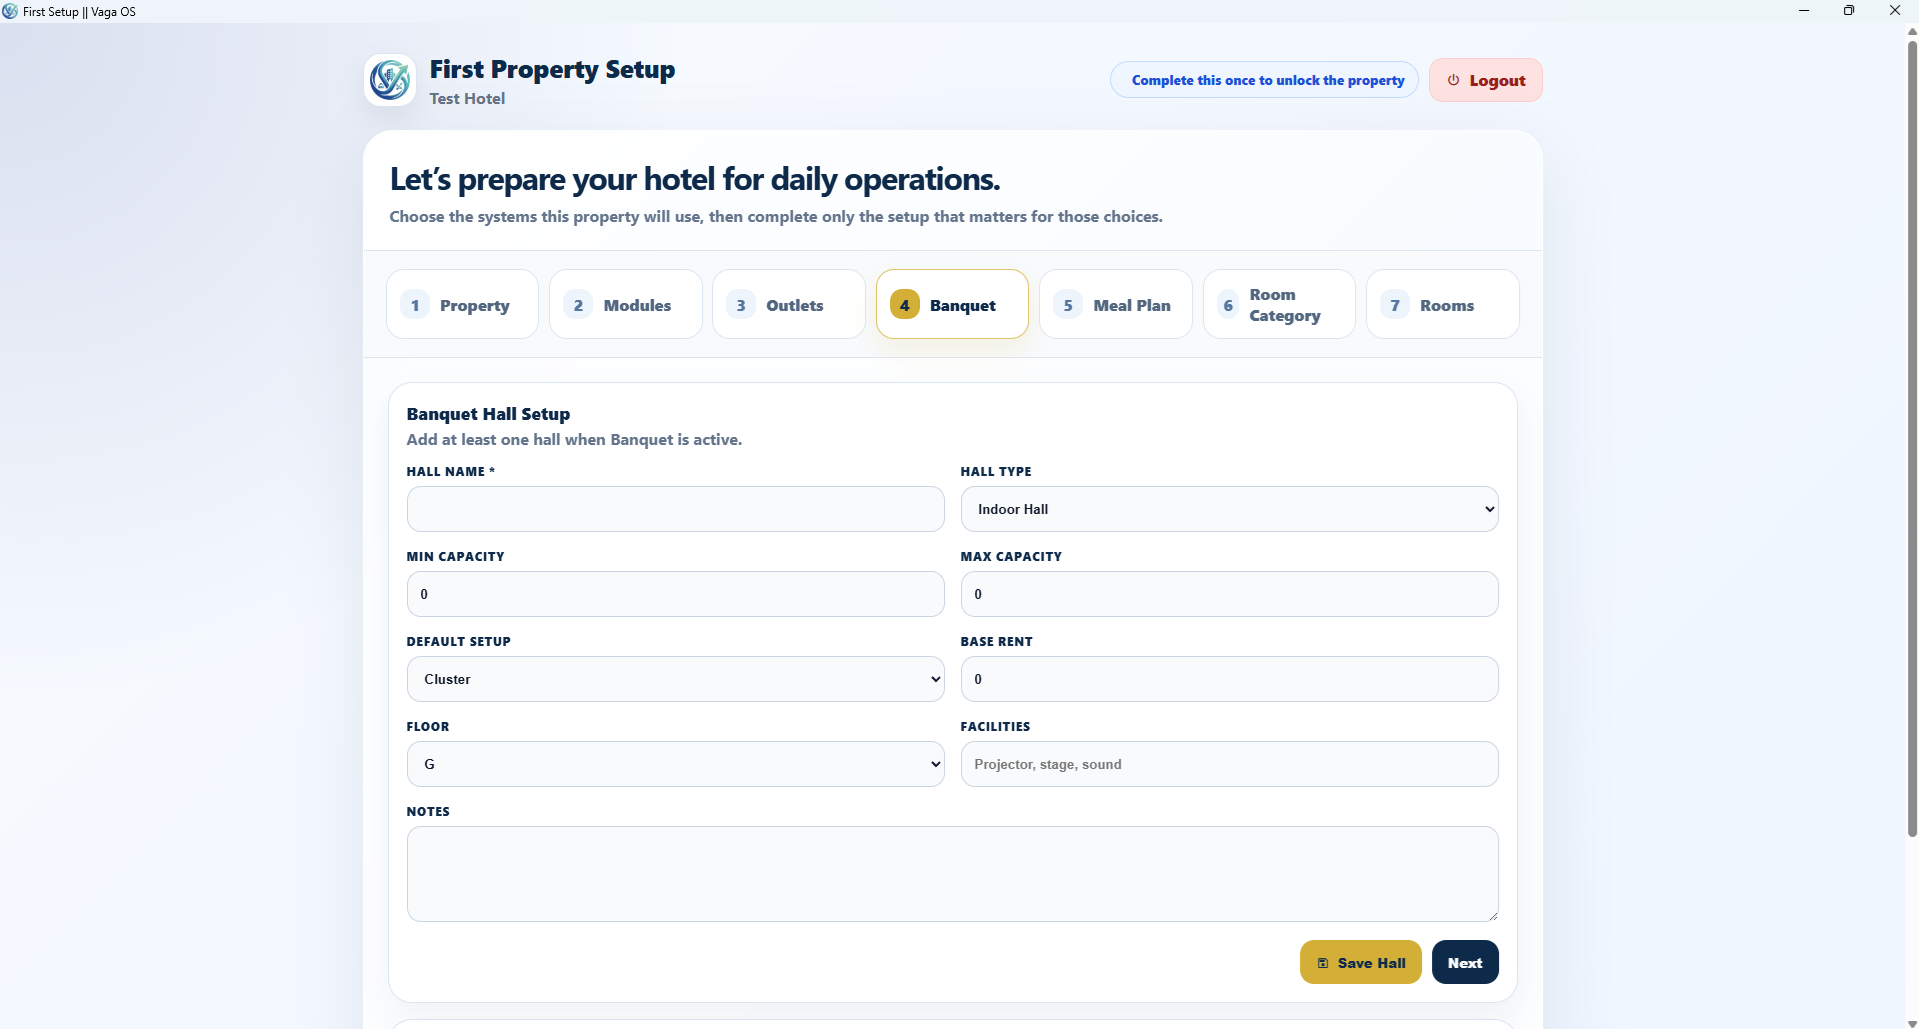
First Login Setup - Add banquet hall if active
4

Add banquet hall if active

If Banquet is selected, add hall details such as hall name, capacity, setup style, rent and facilities.

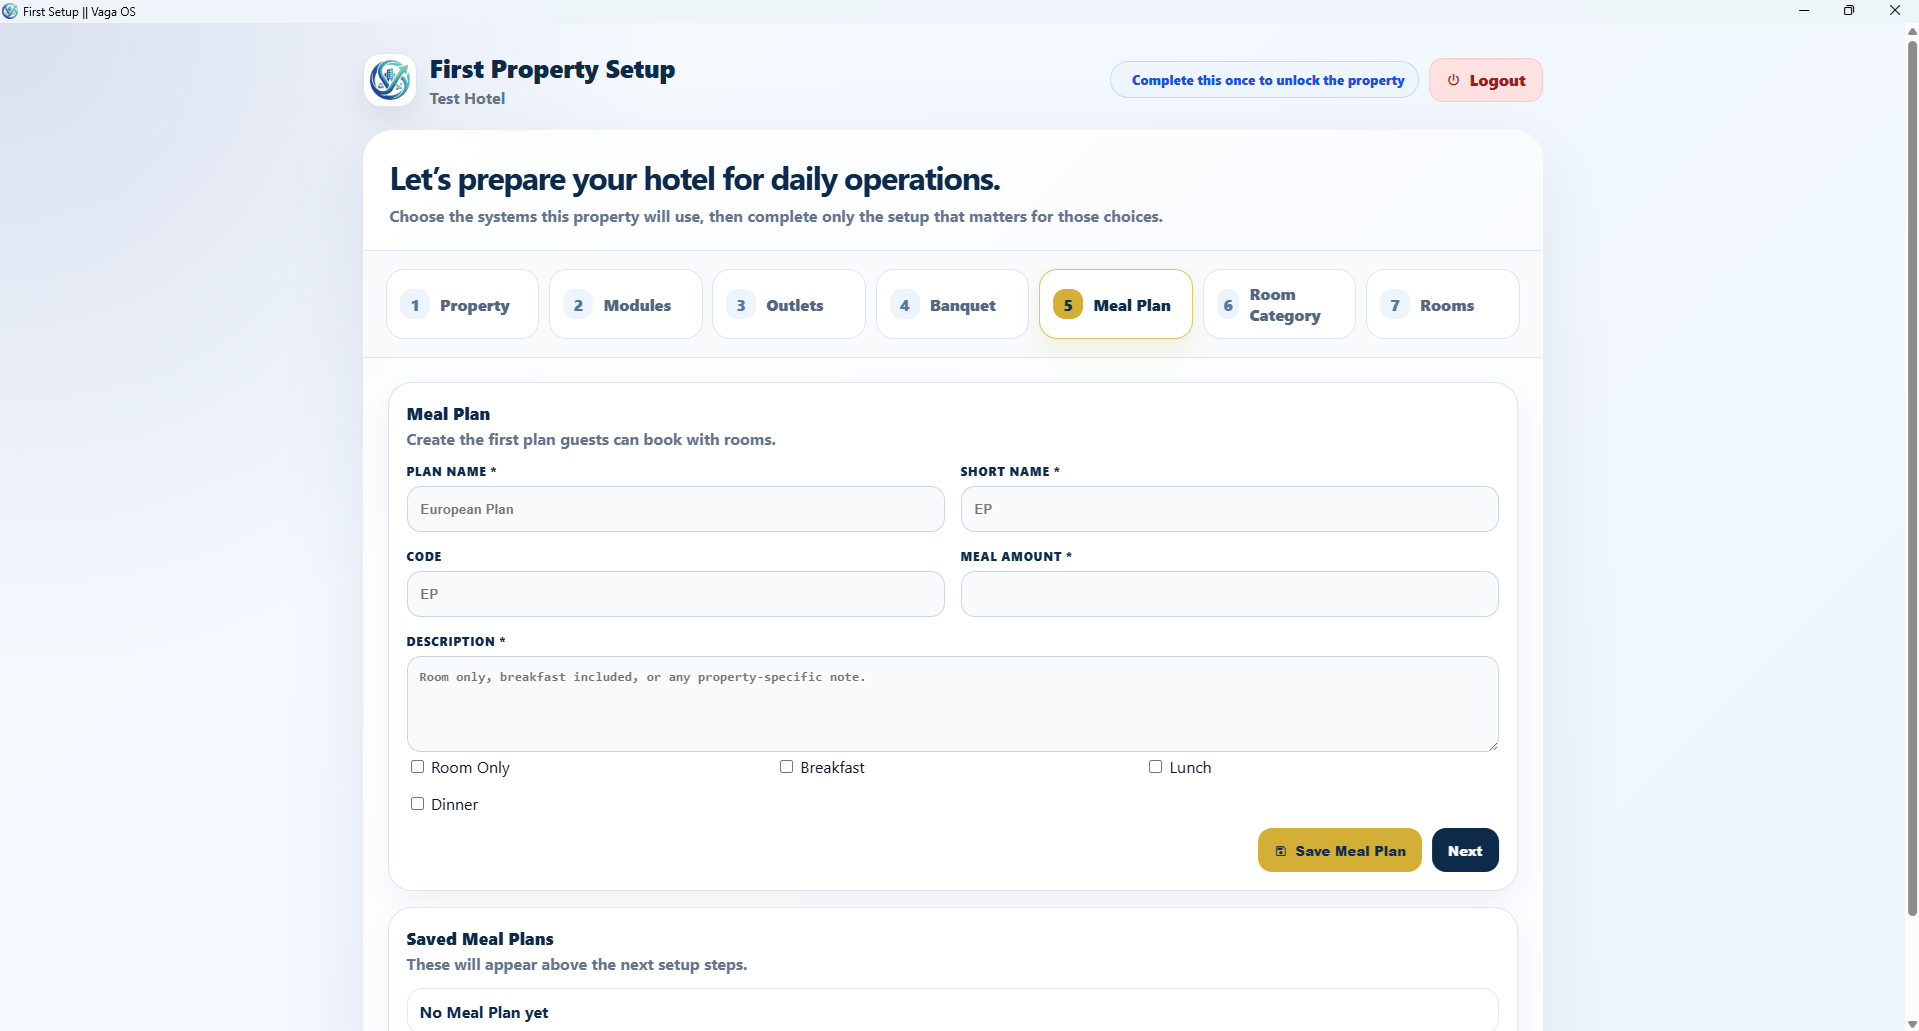
First Login Setup - Create meal plans
5

Create meal plans

Add the first meal plans guests can book with rooms, such as EP or CP, with description and meal amount.

First Login Setup - Add room categories and rates
6

Add room categories and rates

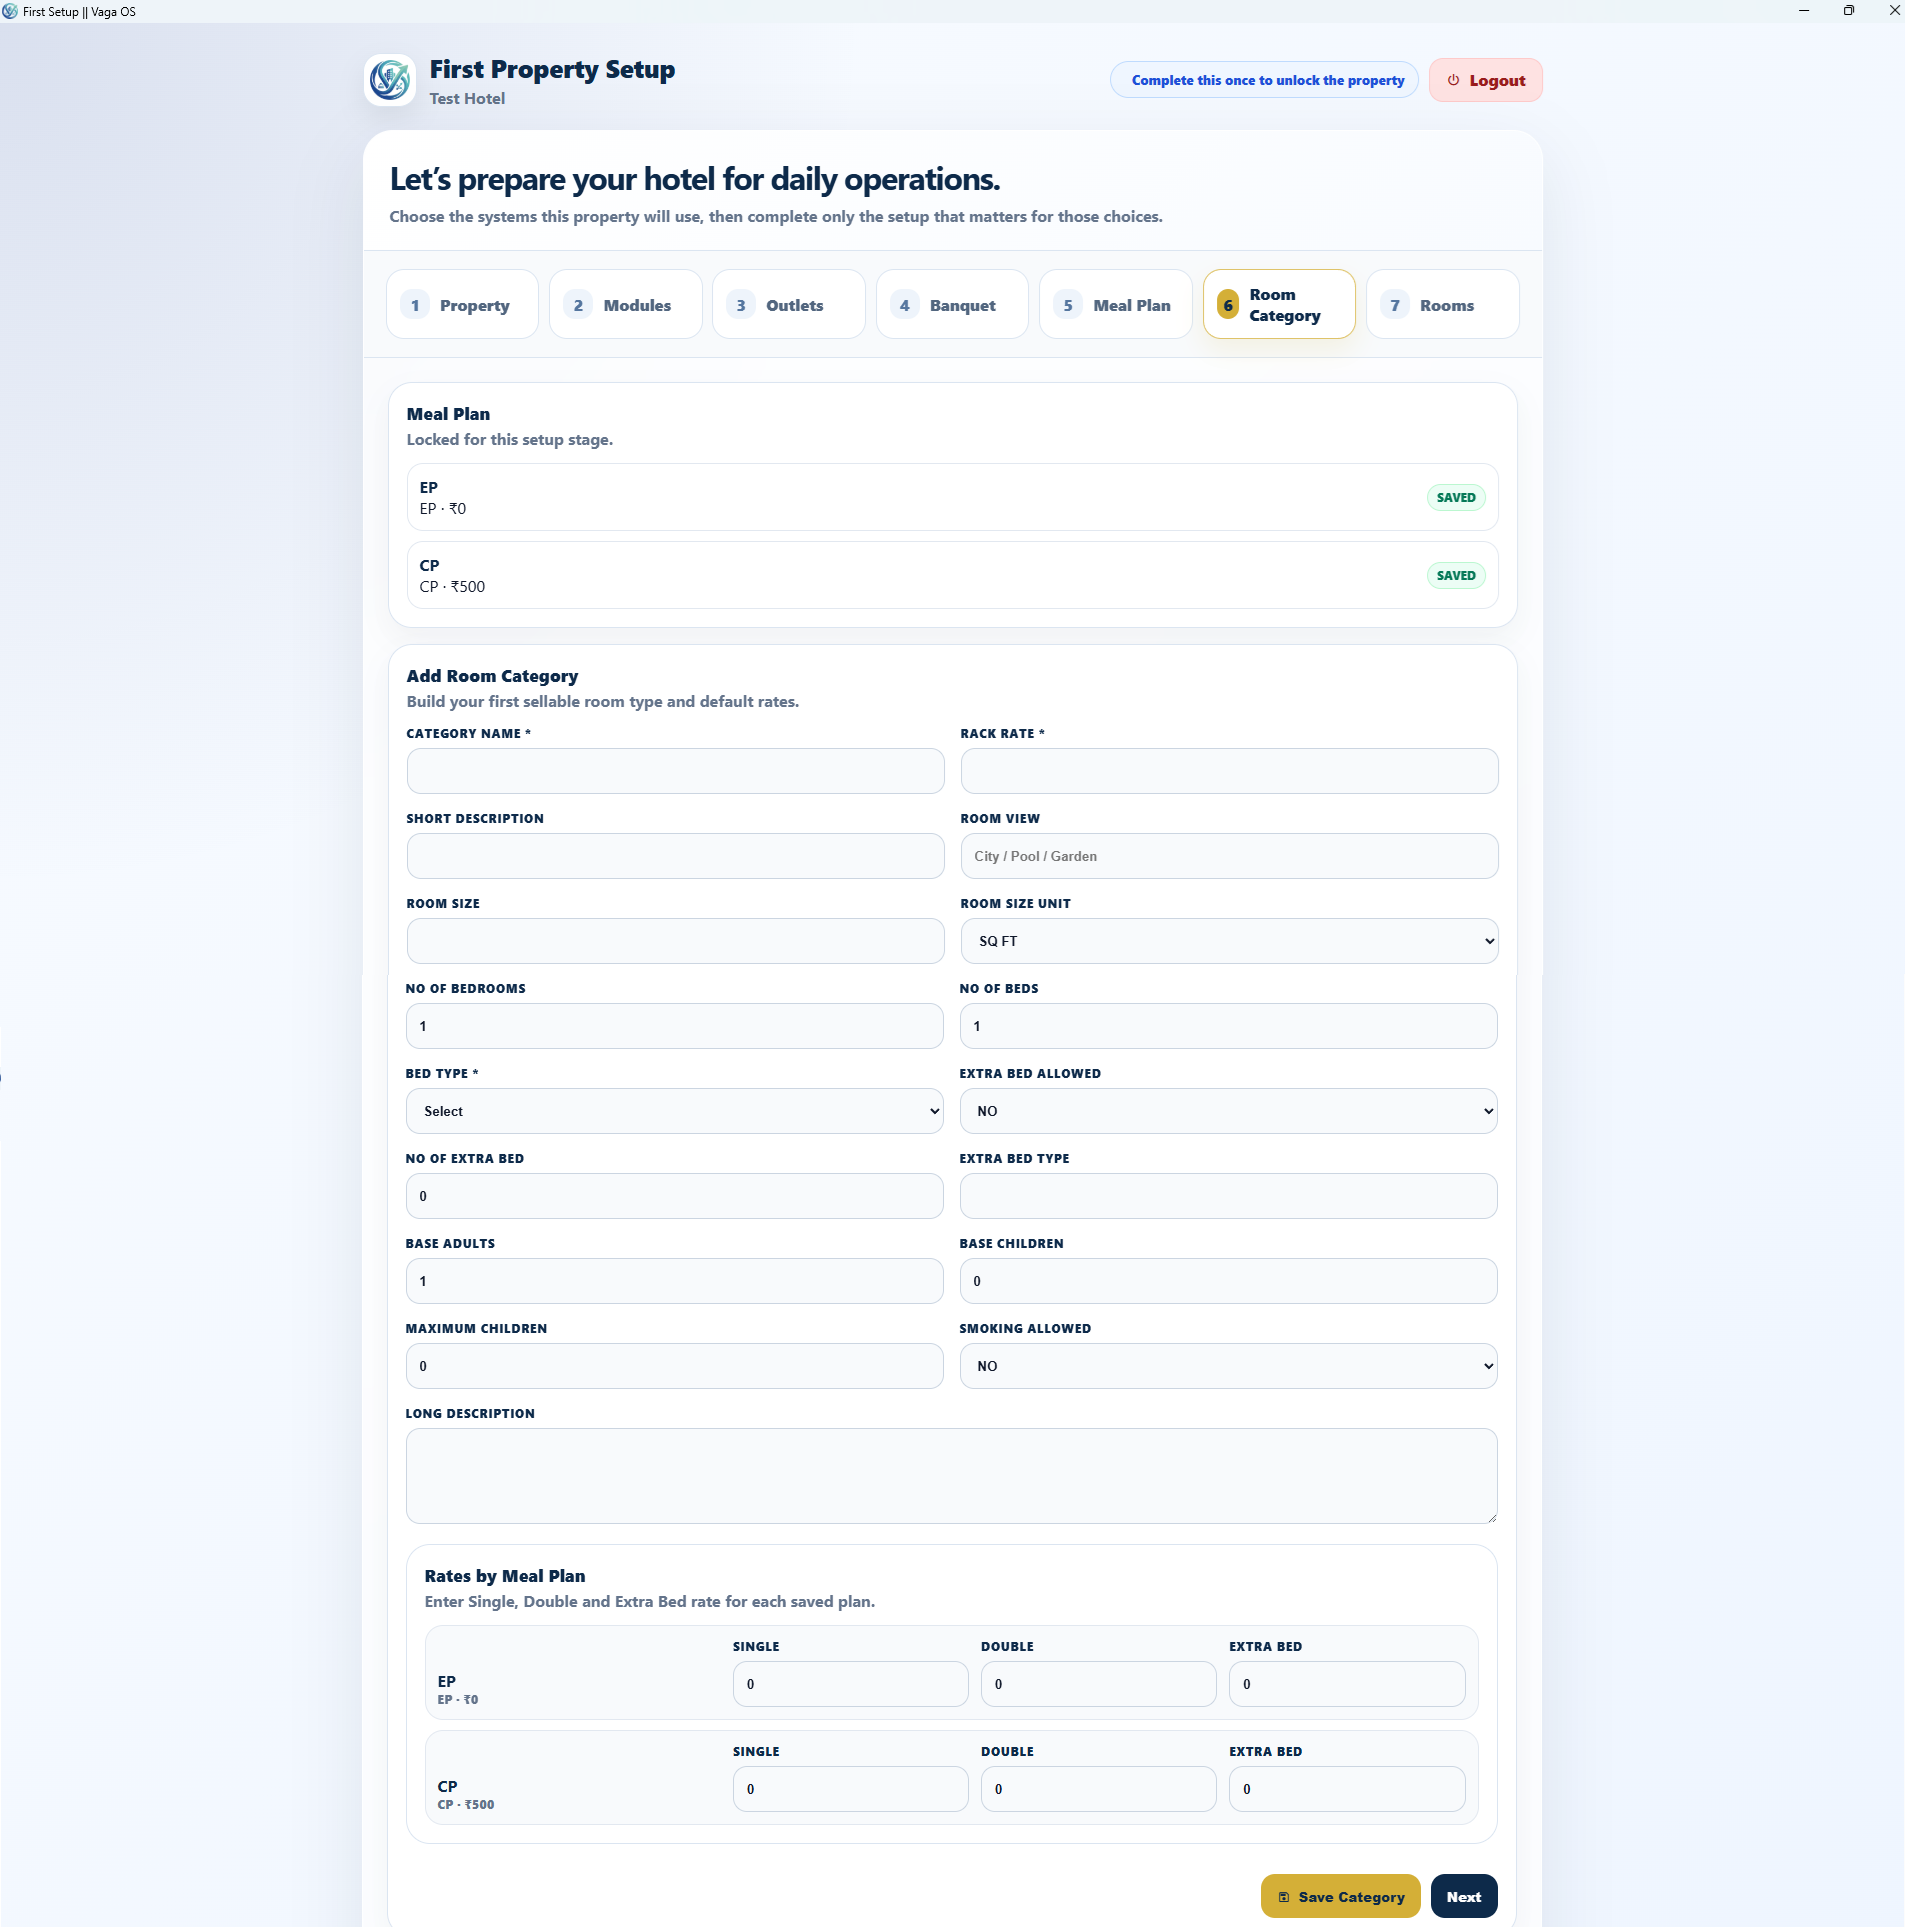
Create sellable room categories and enter single, double and extra bed rates for each saved meal plan.

First Login Setup - Add rooms and finish setup
7

Add rooms and finish setup

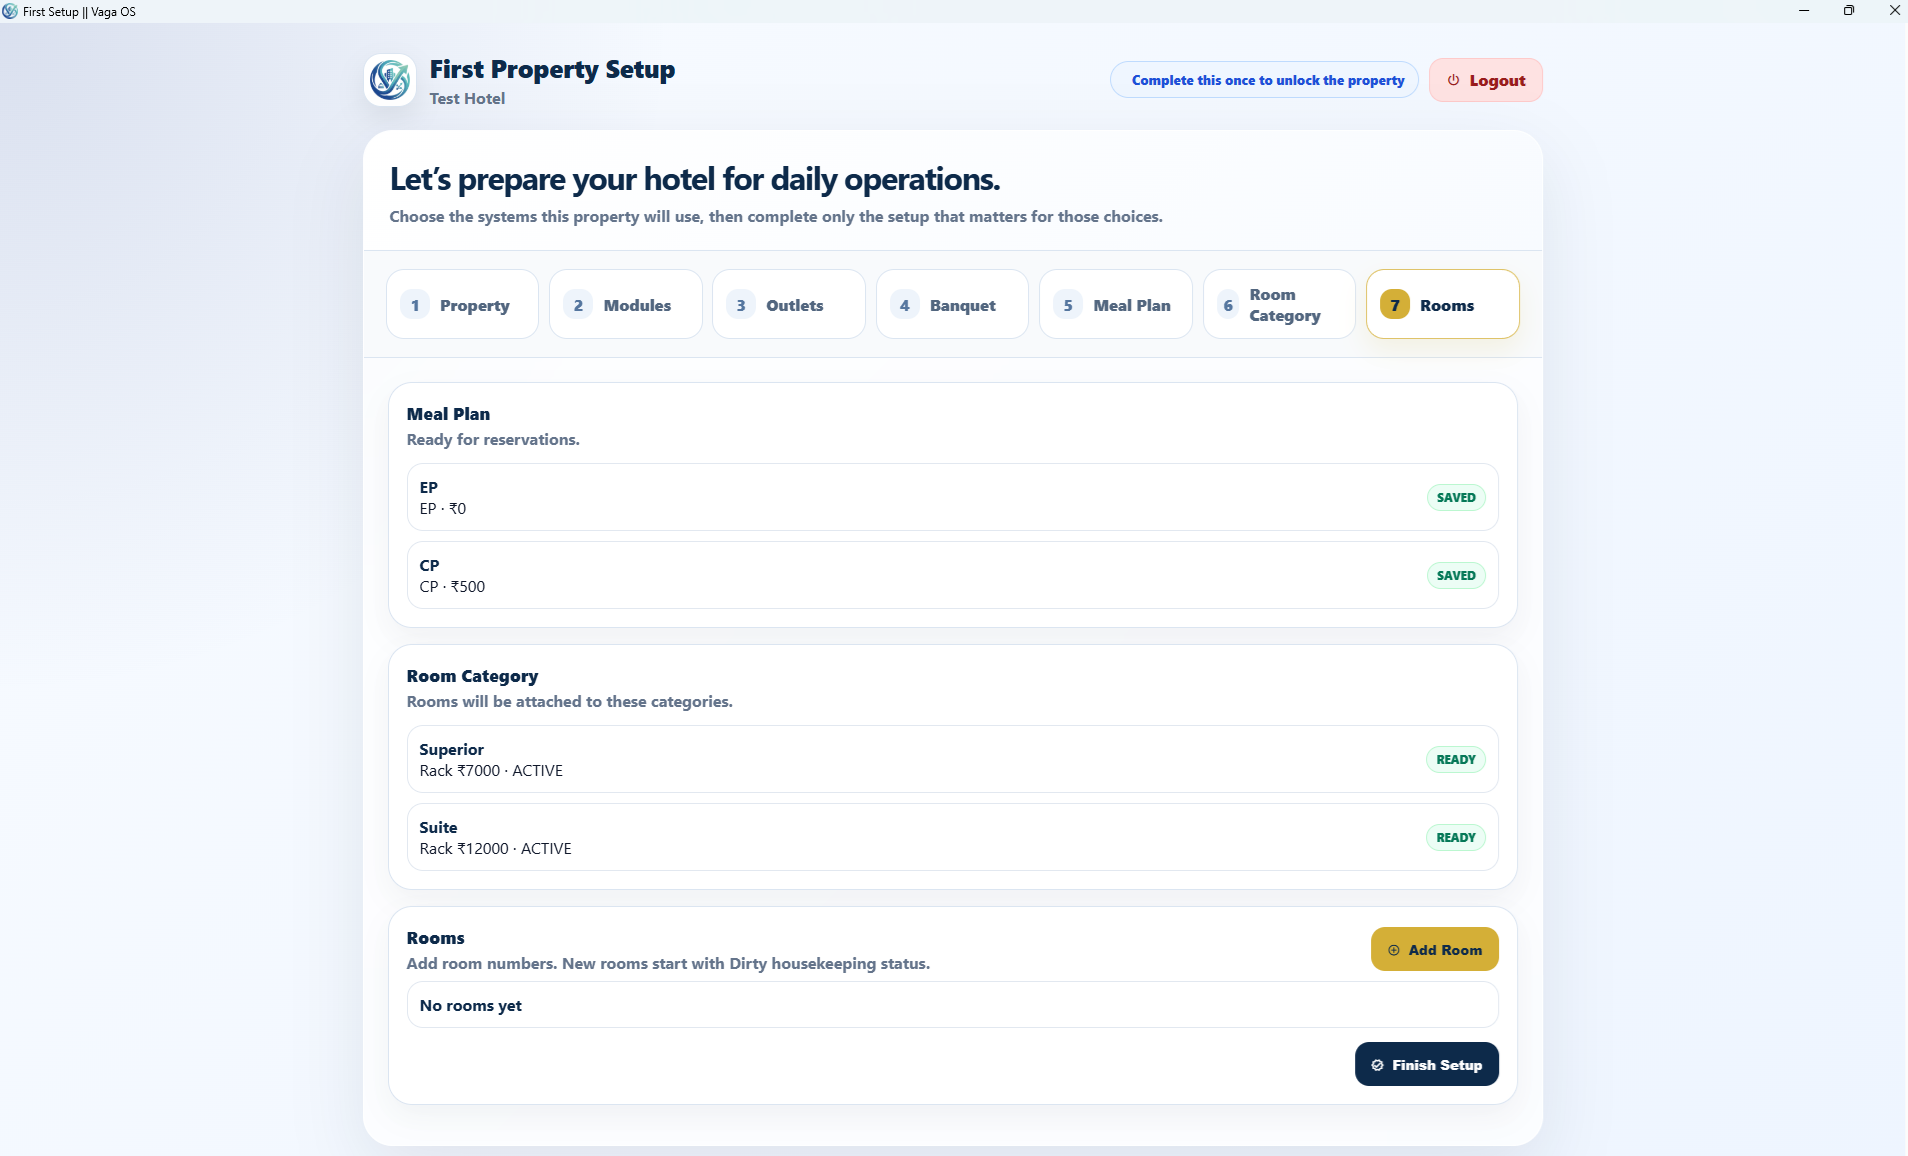
Add room numbers under the saved categories. When rooms are ready, click Finish Setup to start using the property.

1

Start with the IT module

After the first setup is complete, open the IT module to keep the property foundation correct. This is the place to review property details, GST setup, active modules, outlets and employee rights.

  • GST setup for billing and tax details.
  • Module setup to activate or deactivate departments as your property grows.
  • Outlet setup for F&B, Kitchen and Store working areas.
  • Employee Permission to decide exactly what each employee can read, add, edit or delete.
2

Configure Front Office before taking bookings

Open Front Office setup and settings before daily reservations begin. These masters keep booking, walk-in, guest stay, billing and reports consistent.

  • Market Segment and Business Source for reservation classification.
  • Meal plans, room categories, room numbers, amenities and policies.
  • Rates by meal plan so room selling works clearly for Single, Double and Extra Bed.
3

Prepare employee and HR masters

Use HR and employee pages to build the team structure. Add employees only after departments and basic reporting details are ready, so employee records stay clean from day one.

  • Departments in HR Settings.
  • Add Employee for staff profile, employment details and contact information.
  • Leave setup and HR employee permissions for HR users.
4

Complete module-wise setup

Each active department can have its own setup or settings area. Visit those pages once and complete the masters your property actually uses.

  • Banquet: hall setup, capacity, rent, facilities and banquet employees.
  • Store: item masters, categories and store controls.
  • F&B, Kitchen and Housekeeping: outlets, employees and operational setup as required.
5

Review access before live use

Before handing the system to the team, test login with a few employee accounts. Confirm each person sees only the modules, outlets and pages they are supposed to use.

  • Give full access only to trusted administrators.
  • Use Read/Add/Edit/Delete rights carefully for cash, billing, inventory and employee data.
  • Recheck permissions whenever a new outlet, module or employee is added.

VagaOS Server File

Use this on the main PC where your hotel database and central services will stay. This machine becomes the core system for your property.

  • Main PC installation for the property.
  • Stores the working data used by other PCs.
  • Registration is required before download starts.
For Windows main PC. After download, Windows may ask for confirmation before running a new installer.
SHA256 verificationUse this fingerprint after download to confirm the installer is original and unchanged.
C0DC7794610F705BC39C4F6B75FCE4171419B93DF3D911B2EE6A57686E488919

VagaOS Client File

Use this on all other PCs in the same hotel network. These systems connect to the main Server PC for daily operations.

  • For front desk, outlet, office and department PCs.
  • Designed for computers on the same local network.
  • No form required for client download.
For Windows client PCs. Install this on the other computers that will connect to your main Server PC.
SHA256 verificationUse this fingerprint after download to confirm the installer is original and unchanged.
859B22BADB396EFB4A6491A228E4B6A51E4F3048856BBF549E3F2F4E00708079

Register Your Property

After this form is submitted, the request email will be sent and the Server file download will start automatically.